
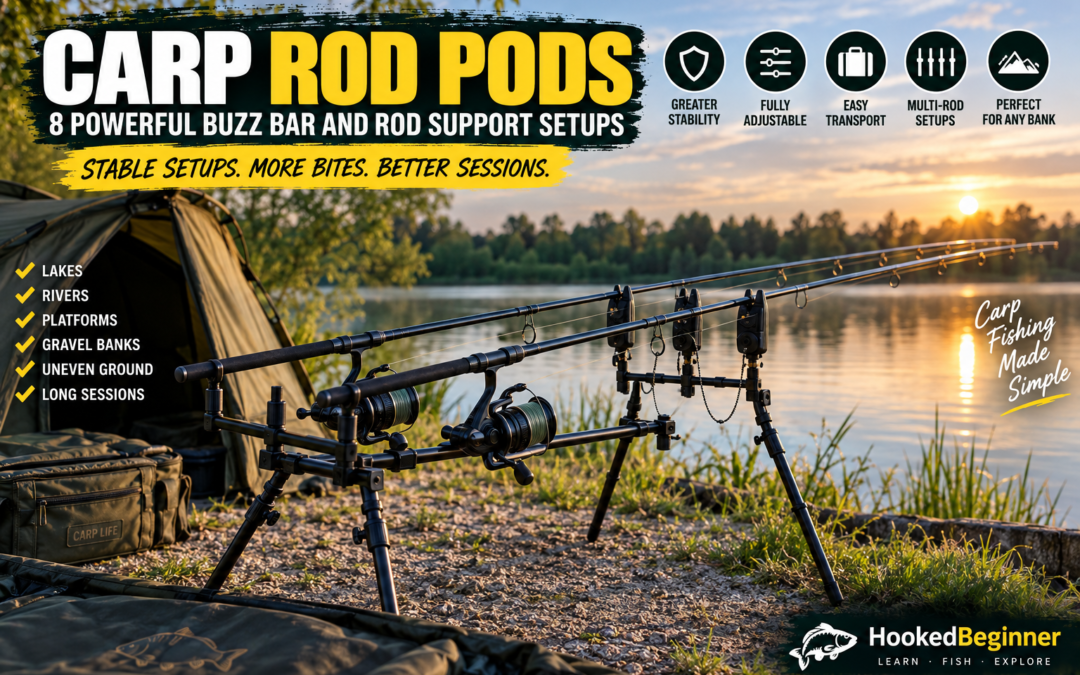
Carp Rod Pods: 8 Powerful Buzz Bar and Rod Support Setups
Carp rod pods give anglers a stable way to position one or more carp rods above the bank while keeping the setup organized and ready for a bite. A good pod can help keep rods aligned, support compatible bite alarms and rests, and make it easier to manage a multiple-rod setup without relying entirely on uneven ground.
The right system is not simply the largest or most expensive setup. The ideal arrangement depends on where you fish, how many rods you use, the shape of the bank, how much adjustment you need, and whether you regularly move between venues.
Some anglers prefer traditional banksticks and individual rests, while others want a complete pod with front and rear buzz bars. There are also compact travel pods, highly adjustable systems, and heavier setups designed for stability on demanding banks.
This guide explains how carp rod pods work, how buzz bars fit into the system, which configurations are useful in different situations, what components you need, and what to look for before buying or assembling a setup.
What Are Carp Rod Pods and Buzz Bars?
A carp rod pod is a support frame designed to hold fishing rods in a controlled position above the ground. A typical pod uses a central frame or crossbar system with adjustable legs, front and rear supports, and buzz bars or rod rests.
The buzz bars are the horizontal bars that hold multiple rod positions. Depending on the design, a front buzz bar may hold the rod fronts or bite alarms, while a rear buzz bar supports the butt sections of the rods.
This creates a stable platform where several rods can sit in a predictable arrangement instead of being placed independently on separate supports.
A typical setup may include:
- Pod frame: The central structure connecting the front and rear supports.
- Front buzz bar: Holds the front rod rests or compatible bite alarms.
- Rear buzz bar: Supports the rod handles or rear rests.
- Adjustable legs: Allow the pod to be leveled on uneven ground.
- Banksticks: Some systems use removable or interchangeable bankstick-style supports.
- Rod rests: Keep the rod securely positioned on the bars.
- Bite alarms: Can be attached to the front support when compatible.
- Locking points: Keep the frame secure after adjustment.
The important distinction is that a pod is a complete support arrangement, while a buzz bar is one component of that arrangement.
Modern pod designs demonstrate how much adjustability is available. For example, Fox's current Black Label Slim Pod uses adjustable legs, an adjustable frame length, buzz bars and a transport bag. See the Fox Black Label Slim Pod specifications.
Why Carp Rod Pods Matter
A rod pod can solve several practical problems that anglers encounter when fishing from banks, platforms, gravel areas, hard ground, or locations where traditional banksticks are difficult to position.
Stable Rod Position
A properly adjusted pod can keep multiple rods aligned at a consistent height and angle. This can make the setup easier to monitor during a long session.
Multiple Rod Management
Buzz bars provide a simple way to position several rods side by side. This keeps the equipment concentrated in one area instead of spreading separate rests across the bank.
Uneven Ground
Adjustable legs help level a pod when the fishing position is sloped or irregular. Independent leg adjustment becomes particularly useful when the front and rear supports sit at different heights.
Hard Banks
Some fishing locations make traditional banksticks difficult to use. Hard-packed soil, concrete edges, wooden platforms and gravel can all make a freestanding pod more practical.
Organized Bite Detection
When bite alarms are mounted consistently across the front buzz bar, the rods can sit in a predictable arrangement. This can make it easier to organize indicators and line positions.
Easy Transport
Many pods are designed to break down into smaller sections. This can be useful when walking to a swim or transporting tackle between different fishing locations.
That said, stability depends on correct setup. A poorly assembled pod can still move, twist or tip regardless of how much the system cost.
8 Carp Rod Pod and Buzz Bar Setups
1. Compact Two-Rod Pod
A compact two-rod pod is designed for anglers who fish with a small number of rods and want a lightweight support system.
This configuration usually has a short frame, two-rod buzz bars and relatively compact legs. It can be useful for short sessions, mobile anglers and fishing situations where equipment weight matters.
The main advantage is portability. A smaller pod takes less space in a tackle bag or vehicle and can be faster to assemble.
The trade-off is that compact systems may have less adjustment range than larger pods. Before buying one, check the minimum and maximum dimensions so you know how it will fit your rods and alarms.
2. Three-Rod Buzz Bar Pod
A three-rod setup is a common configuration for anglers who want more coverage while still keeping the pod relatively compact.
The wider buzz bars provide three rod positions across the front and rear of the system. This lets each rod occupy its own position without requiring three independent support systems.
Three-rod buzz bars are useful when you want consistent spacing between rods. Make sure the center position does not interfere with reel handles or the placement of the line.
When using three rods, pay close attention to the overall balance of the system. A wider arrangement can place more leverage on the pod if the rods are angled aggressively.
3. Four-Rod Pod System
A four-rod pod gives you a broader support platform for anglers who regularly fish with four rods where local regulations permit it.
The extra width requires careful positioning. Each rod needs enough clearance for the reel handle, line and bite indication equipment.
The frame should also be wide and strong enough to maintain its rigidity when fully loaded.
A four-rod arrangement is best suited to anglers who know they need the extra capacity. If you normally use fewer rods, a smaller pod may be easier to carry and quicker to set up.
4. Adjustable Long-Frame Pod
A long-frame pod uses an extendable or adjustable central frame to accommodate different rod lengths and fishing positions.
This type of system is useful when you regularly change fishing locations or use rods with significantly different lengths.
Adjustment can also help when you need to change the distance between the front and rear supports. Longer rods may benefit from additional support spacing, while shorter rods can often be positioned more compactly.
When choosing a long-frame system, look closely at the locking mechanisms. The frame should remain secure after adjustment without unwanted movement.
5. Adjustable-Leg Pod for Uneven Banks
Adjustable legs are one of the most valuable features for anglers fishing from uneven ground.
Each leg can be extended or retracted to help level the front and rear buzz bars. This is particularly useful when one side of the swim is lower than the other.
The goal is not simply to make the pod look level. Proper adjustment helps distribute the weight more evenly and can improve stability.
On sloping banks, make sure the feet are firmly planted before placing rods on the system. Small adjustments should be made before the pod is fully loaded.
Current pod designs from established manufacturers show how useful this feature can be. JRC's Extreme TX Pod, for example, offers adjustable length, height and leg angles and is available in three- and four-rod configurations. See the JRC Extreme TX Pod specifications.
6. Pod With Bankstick Conversion
Some pod designs allow the main supports to be replaced or supplemented with banksticks. This provides additional flexibility when a normal pod configuration is not ideal for a particular swim.
A bankstick conversion can be useful when the ground allows individual supports to be inserted but the angler still wants the buzz bar arrangement.
Before choosing a conversion system, check that the connections are designed to work together. Threads, diameters and mounting interfaces should match the rest of the pod components.
7. Low-Profile Pod Setup
A low-profile setup positions the rods closer to the ground. This can be useful when you want a compact arrangement or when the fishing situation calls for a lower rod angle.
The main benefit is reduced overall height. However, the lower position means you need to pay closer attention to the bank surface, vegetation and line path.
A low setup should never place the rod tips or line where they can become obstructed by nearby vegetation or obstacles.
8. Heavy-Duty Carp Rod Pod
A heavy-duty pod is built around greater rigidity, larger components and stronger connections. These systems are aimed at anglers who need increased stability or regularly fish difficult banks.
A heavier pod can be advantageous when strong winds, uneven surfaces or larger rod setups make lightweight equipment difficult to keep stable.
The trade-off is transport. A heavy-duty system may take more space and add weight to your equipment load.
For mobile anglers, the extra stability may not justify the additional bulk. For anglers who stay in one swim for longer sessions, it may be more practical.
Carp Rod Pod Comparison Table
| Setup | Best Use | Main Advantage | Portability | Adjustment |
|---|---|---|---|---|
| Compact Two-Rod Pod | Short sessions and mobile fishing | Lightweight and simple | High | Moderate |
| Three-Rod Buzz Bar Pod | General multi-rod fishing | Balanced capacity | Good | Moderate |
| Four-Rod Pod | Higher-capacity sessions | Four rod positions | Moderate | Moderate |
| Long-Frame Pod | Different rod lengths | Flexible spacing | Moderate | High |
| Adjustable-Leg Pod | Uneven banks | Better leveling | Good | High |
| Bankstick Conversion | Mixed ground conditions | Configuration flexibility | Good | High |
| Low-Profile Pod | Compact low setups | Lower rod position | Good | Moderate |
| Heavy-Duty Pod | Demanding conditions | Greater rigidity | Lower | High |
How to Choose the Right Carp Rod Pod
When comparing carp rod pods, start with the fishing situation rather than the appearance of the product.
Choose the Number of Rod Positions
First decide how many rods you normally fish. A two-rod system is unnecessary for someone who regularly needs three or four positions, but a large four-rod pod can add weight if you rarely use that capacity.
Always confirm local fishing regulations before assuming a particular number of rods is permitted.
Check Pod Width
The width of the front and rear buzz bars affects how closely the rods sit together. Make sure there is sufficient clearance around the reel handles, alarms and line.
Look at Height Adjustment
Height adjustment becomes important when fishing from different banks or platforms. A system with a wide adjustment range gives you more flexibility.
Check Leg Adjustment
Independent leg adjustment is useful when the ground is uneven. Look for secure locking mechanisms and feet that can maintain contact with the ground.
Consider Frame Length
The frame length affects how far apart the front and rear supports can be placed. Longer rods may benefit from greater support spacing.
For broader equipment selection, use the HookedBeginner fishing rod buying guide.
Match the Rod Specification
A pod does not determine whether your rod is suitable for carp fishing. Rod length, power and action still matter.
Review the fishing rod power guide and fishing rod action guide when choosing the rod that will sit on the pod.
Think About Transport
Measure the packed dimensions of the pod before buying. A system that fits your fishing needs but is inconvenient to transport may become frustrating during regular sessions.
Inspect the Connections
Threads, clamps, locking points and buzz-bar attachments should all feel secure. Loose connections can create unwanted movement after the rods are placed on the system.
Best Setups for Different Fishing Situations
Flat Grass Bank
A conventional three-rod or four-rod pod can work well on a relatively flat, firm grass bank. You may not require an extreme adjustment range, so a straightforward system can be sufficient.
Uneven Riverbank
An adjustable-leg system becomes more useful on a riverbank where the ground changes height around the swim.
Make sure the pod feet are firmly positioned and that the frame is not resting on unstable stones or loose material.
Hard-Packed Ground
If traditional banksticks are difficult to push into the ground, a freestanding pod can provide a practical alternative.
Gravel Bank
Gravel can make traditional supports difficult to position. A pod with stable feet can spread the load rather than concentrating it at the end of one narrow bankstick.
Fishing Platform
Platforms require careful attention to foot placement and available space. A compact pod may be preferable when there is limited room around the rods.
Long Sessions
For long sessions, stability and adjustability become increasingly important. The equipment should remain secure without requiring constant repositioning.
Mobile Fishing
For anglers who move frequently between swims, portability should carry more weight in the decision. Compact pods that assemble quickly can reduce setup time and equipment fatigue.
Windy Conditions
Wind increases the importance of stability. A wider, heavier system with securely positioned feet may be useful, but the setup still needs to be adjusted to minimize unnecessary leverage from the rods.
Materials, Components and Setup
A complete pod setup usually consists of several individual pieces. Understanding what each component does makes it easier to compare different systems.
| Component | Purpose |
|---|---|
| Pod frame | Connects the front and rear supports |
| Front buzz bar | Supports bite alarms or front rod rests |
| Rear buzz bar | Supports the rear sections of the rods |
| Adjustable legs | Controls pod height and leveling |
| Feet | Provide contact with the bank or platform |
| Rod rests | Hold rods securely on the buzz bars |
| Bite alarms | Provide bite indication when compatible with the setup |
| Threaded connections | Secure alarms, rests and other components |
| Transport case | Protects and organizes the pod components |
Basic Setup Sequence
- Place the pod on the selected fishing position.
- Adjust the legs until the main frame is stable.
- Set the front and rear buzz bars at the desired height.
- Check that both buzz bars are aligned.
- Attach rod rests or compatible bite alarms.
- Position the rods and make sure each rod is seated properly.
- Check that the feet remain firmly planted after the system is loaded.
- Inspect the complete setup before leaving the rods in position.
Do not fully load the system before making all major adjustments. It is easier to level the pod before the rods, reels and other equipment are attached.
For the reel side of the setup, the HookedBeginner fishing reel buying guide can help you compare reel size, capacity and configuration.
Take Me Fishing explains that fishing rigs are combinations of terminal components selected according to species and conditions. That same principle applies here: the pod should be selected according to your fishing conditions rather than treated as a universal solution. Read the Take Me Fishing guide to fishing rigs.
Common Carp Rod Pod Mistakes
Using a Pod That Is Too Large
More capacity is not automatically better. A large pod can add unnecessary weight and take longer to transport and assemble.
Ignoring Ground Conditions
A pod should be selected around the fishing environment. A system designed for level ground may require more adjustment when used on an uneven riverbank.
Failing to Tighten Connections
Loose buzz bars, legs or frame connections can allow the structure to move. Check every locking point before placing the rods on the pod.
Overloading the Buzz Bars
Make sure the buzz bar is designed to support the number of positions you intend to use. Do not improvise additional rod positions that the system was not designed to hold.
Setting the Pod Too High
An unnecessarily high setup can increase leverage and make the entire system less stable. Use only the height you actually need.
Putting Rods on an Unstable Footing
Even the strongest pod cannot compensate for poor placement. Make sure all feet are firmly supported before loading the rods.
Ignoring Transport Size
Always check the packed length and total number of components. A pod that is difficult to carry can become a problem during longer walks to the swim.
Not Inspecting the Pod Before Use
Threads, clamps and adjustable sections can wear over time. Inspect the system regularly, especially after long periods of storage or heavy use.
Carp Rod Pod Buying Checklist
| Check | What to Look For |
|---|---|
| Rod capacity | Match the number of rod positions to your normal fishing |
| Buzz bar width | Allow adequate spacing around rods and reels |
| Frame length | Provide suitable support spacing for your rods |
| Leg adjustment | Useful range for the ground where you fish |
| Pod height | Enough adjustment without unnecessary extension |
| Stability | Secure feet and rigid connections |
| Materials | Suitable strength, corrosion resistance and durability |
| Transport | Acceptable packed length and weight |
| Compatibility | Works with your alarms, rests and rods |
| Replacement parts | Check whether important components can be replaced |
| Storage | Case or bag suited to the complete system |
| Regulations | Confirm the setup is appropriate for the water you fish |
Related HookedBeginner Fishing Guides
A rod pod is only one part of the complete fishing system. These HookedBeginner guides cover equipment that works alongside your support setup:
- Fishing Rod Buying Guide for choosing the rod itself.
- Fishing Rod Power Guide for understanding rod power ratings.
- Fishing Rod Action Guide for understanding rod action.
- Fishing Reel Buying Guide for selecting a suitable reel.
- Fishing FAQ for additional fishing equipment answers.
- Sonik Xtractor Carp Kit for a dedicated carp fishing product already listed on HookedBeginner.
For broader carp-fishing fundamentals, the IGFA carp angling guide covers carp tackle, bait, shore fishing and hair-rig presentations.
Frequently Asked Questions
What are carp rod pods used for?
Carp rod pods are used to support fishing rods in an organized position above the ground. They can hold multiple rods and provide mounting points for buzz bars, rod rests and compatible bite alarms.
What is a buzz bar on a carp pod?
A buzz bar is the horizontal support bar that holds multiple rod positions. A front buzz bar commonly supports the rod fronts or bite alarms, while a rear buzz bar supports the rod handles.
How many rods can a carp rod pod hold?
Capacity depends on the individual system. Common configurations include two-, three- and four-rod arrangements. Always check the manufacturer's intended capacity and local fishing regulations.
Are carp rod pods better than banksticks?
They serve different purposes. A pod can be useful on hard, gravelly or uneven ground where banksticks are difficult to position. Banksticks can provide more flexibility when the ground is suitable for inserting individual supports.
Can carp rod pods be used on uneven ground?
Yes. Models with independently adjustable legs are designed to provide greater flexibility on uneven banks. Correct adjustment is important because the pod must remain stable after the rods are installed.
What size carp rod pod should I buy?
Choose the size according to the number of rods you use, the rod lengths you fish with, the amount of adjustment you need and how you transport your equipment.
Do carp rod pods work with bite alarms?
Many do. Bite alarms can commonly be mounted on the front buzz bar when the relevant connection is compatible. Check the thread size and mounting arrangement before purchasing.
Do I need front and rear buzz bars?
For a conventional pod setup, front and rear support bars provide a stable position for the complete rod. The exact design varies, so check how the pod supports the rod butt and front section before buying.
Are heavier carp rod pods more stable?
Weight can contribute to stability, but stability also depends on the frame design, leg position, footing, width, adjustment and how the rods are positioned. A heavy pod placed poorly can still be unstable.
How do I stop a carp rod pod from moving?
Place all feet on stable ground, adjust the legs evenly, tighten the connections, keep unnecessary height to a minimum and make sure the rods are positioned without creating excessive leverage on the frame.
Can a carp rod pod be used for river fishing?
Yes. River fishing can make adjustable legs particularly useful because banks are often uneven. Always position the pod securely and make sure the line path is appropriate for the current and surrounding structure.
What should I check before leaving my rods on a pod?
Check the feet, legs, buzz bars, frame connections, rod rests, bite alarms, reel positions and line path. Make sure every component is secure and the rods cannot easily slide from their supports.
Where can I learn more about carp rigs?
Take Me Fishing has a dedicated guide to carp fishing knots and rigs, including the knotless knot commonly used for hair-rig presentations. Read the carp fishing knots guide.
Final Thoughts
Carp rod pods can make a multi-rod carp setup more organized, adjustable and practical, especially when traditional banksticks are difficult to use. The most useful system is the one that matches your fishing location rather than simply having the largest number of features.
Start by deciding how many rods you normally use. Then consider buzz bar width, frame length, leg adjustment, height, transport size and stability. If you regularly fish uneven banks, prioritize adjustment. If you move between swims frequently, prioritize portability. If you stay in one location for long sessions, greater rigidity and a wider adjustment range may matter more.
Remember that the pod supports your fishing equipment; it does not replace the need for properly matched rods, reels and terminal tackle. Use the appropriate rod specifications for the fish and techniques you are targeting, and make sure the complete system is stable before leaving it in position.
For the rest of your setup, continue with HookedBeginner's fishing rod buying guide, fishing rod power guide, and fishing reel buying guide to build a balanced outfit around your rod support system.
A well-adjusted pod, correctly positioned rods and secure connections give you a cleaner setup and let you focus on the fishing rather than constantly correcting your equipment.